
Introduction
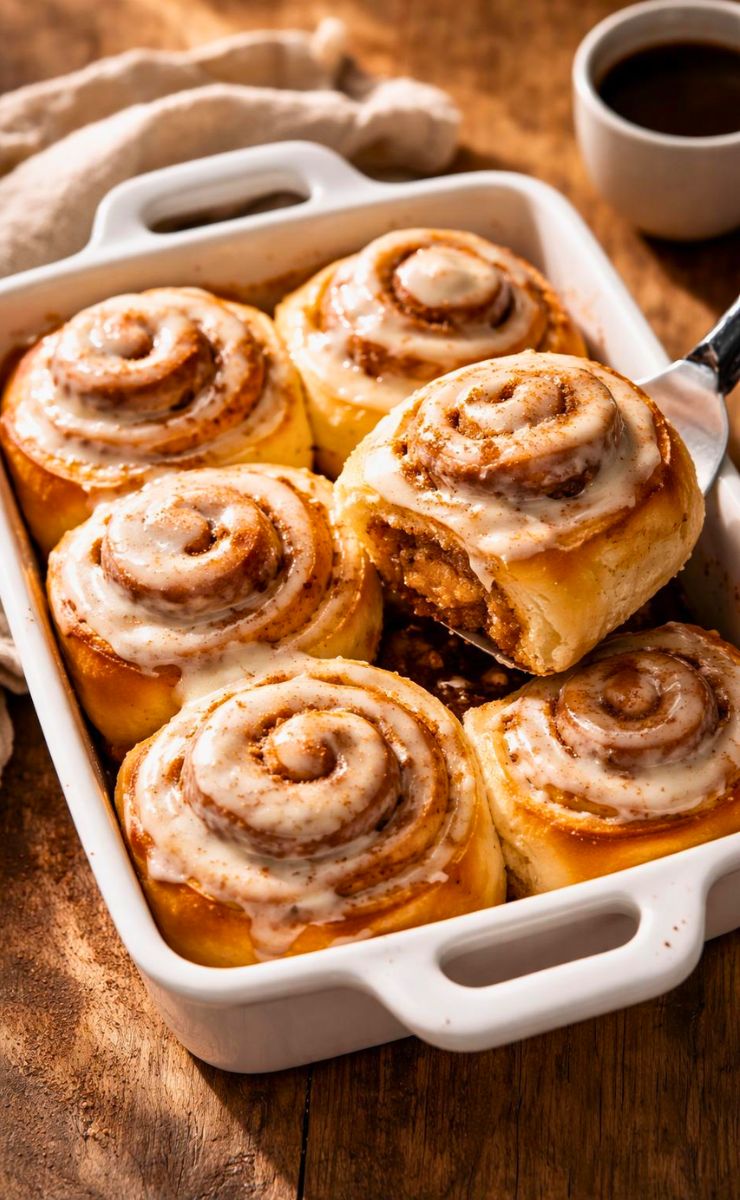
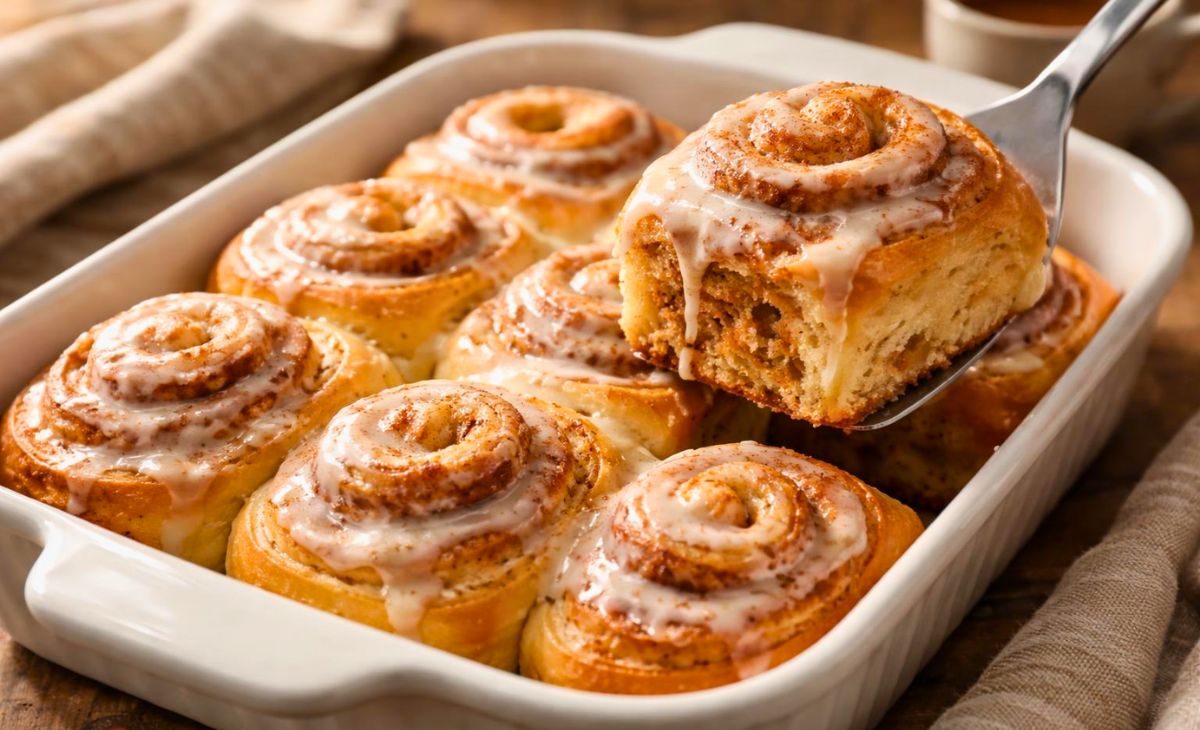
The Pioneer Woman Cinnamon Rolls Recipe is one of my favorite homemade breakfast treats. These rolls are soft, fluffy and filled with sweet cinnamon goodness.
Every bite melts in your mouth. This Pioneer Woman Cinnamon Rolls Recipe is perfect for weekends, holidays or family gatherings.
The warm vanilla icing makes each roll even more delicious. If you love homemade baking, this recipe is simple, comforting and always a crowd-pleaser.
My Experience With This Recipe
The first time I baked these cinnamon rolls, my kitchen smelled amazing. My family gathered around the oven before they were ready. That moment made this recipe special for me.
Since then, I have baked these rolls many times. They always turn out soft and fluffy. I enjoy making them on quiet Sunday mornings and during holiday celebrations.
This recipe is easy to follow. Even beginner bakers can make beautiful cinnamon rolls with a little patience.
Recipe Card Info
- Recipe Name: Pioneer Woman Cinnamon Rolls
- Servings: 12 rolls
- Prep Time: 30 minutes
- Cook Time: 25 minutes
- Rise Time: 90 minutes
- Total Time: 2 hours 25 minutes
- Course: Breakfast
- Cuisine: American
- Calories: About 430 kcal per serving
Equipment List
- Large mixing bowl
- Measuring cups
- Measuring spoons
- Wooden spoon
- Rolling pin
- Dough scraper
- Sharp knife or dental floss
- 9×13-inch baking dish
- Pastry brush
- Small saucepan
- Whisk
- Cooling rack
Ingredients You Need for Pioneer Woman Cinnamon Rolls
For the Dough
- 4 cups all-purpose flour
- 1 cup whole milk, warm
- ¼ cup warm water
- ¼ cup granulated sugar
- 2¼ teaspoons active dry yeast
- ¼ cup unsalted butter, melted
- 2 large eggs
- 1 teaspoon salt
For the Filling
- ½ cup unsalted butter, softened
- 1 cup brown sugar
- 2 tablespoons ground cinnamon
- 1 teaspoon vanilla extract
For the Icing
- 2 cups powdered sugar
- 3 tablespoons melted butter
- 2 tablespoons milk
- 1 teaspoon vanilla extract
- Pinch of salt
Step-by-Step Guide
1. Activate the Yeast
Mix the warm water, sugar and yeast in a small bowl. Stir gently and let it rest for about ten minutes. The mixture should become bubbly and foamy before you continue.
2. Prepare the Dough
Combine the flour and salt in a large bowl. Add the warm milk, melted butter, eggs and yeast mixture. Stir until a soft dough forms. It should feel smooth and slightly sticky.
3. Knead the Dough
Place the dough on a lightly floured surface. Knead it gently for about ten minutes. Fold and press until the dough becomes soft, smooth and elastic. This creates fluffy cinnamon rolls.
4. First Rise
Place the dough into a greased bowl. Cover it with a clean towel. Let it rise in a warm place for about ninety minutes. The dough should double in size before shaping.
5. Roll Out the Dough
Transfer the dough onto a lightly floured surface. Roll it into a large rectangle about one-quarter inch thick. Try to keep the thickness even so every roll bakes perfectly.
6. Add the Cinnamon Filling
Spread the softened butter across the dough. Sprinkle the brown sugar evenly over the butter. Finish with the ground cinnamon and vanilla. Cover every corner for rich flavor in every bite.
7. Roll and Slice
Roll the dough tightly from the long side into a log. Slice it into twelve equal pieces using a sharp knife or dental floss. Place each roll into the prepared baking dish.
8. Second Rise
Cover the baking dish with a kitchen towel. Let the rolls rise again for about thirty minutes. They should become soft, puffy, and nearly touch each other before baking.
9. Bake the Rolls
Preheat the oven to 350°F (175°C). Bake the cinnamon rolls for about twenty-two to twenty-five minutes. The tops should become lightly golden while the centers stay soft and tender.
10. Ice and Serve
Whisk together the powdered sugar, melted butter, milk, vanilla and salt until smooth. Spread the icing over the warm cinnamon rolls. Let it melt into every swirl before serving fresh.
Tips to Make the Best Pioneer Woman Cinnamon Rolls
- Use fresh yeast for the best rise.
- Warm the milk gently. Do not let it become hot.
- Measure the flour carefully for soft dough.
- Knead the dough until it feels smooth and stretchy.
- Let the dough rise in a warm place without drafts.
- Spread the filling evenly across the dough.
- Roll the dough tightly to keep neat swirls.
- Do not overbake the rolls. They should stay soft.
- Ice the rolls while they are still warm.
- Serve fresh for the best flavor and texture.
Common Mistakes to Avoid
- Using hot milk that kills the yeast.
- Adding too much flour to the dough.
- Skipping the dough rising time.
- Rolling the dough too thin.
- Cutting uneven roll sizes.
- Overfilling with sugar and butter.
- Baking the rolls too long.
- Spreading icing on completely cooled rolls.
- Forgetting to grease the baking dish.
Serving Suggestions
These cinnamon rolls taste wonderful with hot coffee or fresh tea. They also pair well with cold milk or hot chocolate. Serve them with scrambled eggs, fresh fruit or crispy bacon for a complete breakfast.
They are also perfect for brunch with family and friends. Add extra icing or a sprinkle of chopped pecans before serving for a beautiful homemade touch.
Variations You Can Try
- Add chopped pecans for extra crunch.
- Mix raisins into the cinnamon filling.
- Replace vanilla icing with cream cheese frosting.
- Add a little nutmeg for warm spice.
- Sprinkle orange zest into the filling.
- Use maple icing for a richer flavor.
- Add chopped apples between the cinnamon layers.
- Try a light caramel drizzle before serving.
- Make mini cinnamon rolls for parties.
Storage and Reheating Tips
Store leftover cinnamon rolls in an airtight container at room temperature for up to two days. Refrigerate them for up to five days if needed. Freeze baked rolls for up to two months by wrapping them well.
Thaw overnight in the refrigerator before reheating. Warm each roll in the microwave for about 20 to 30 seconds. You can also reheat them in a 300°F oven for about 10 minutes. Add fresh icing after reheating for the best taste.
Nutrition Information
| Nutrient | Amount Per Serving |
|---|---|
| Calories | 430 kcal |
| Carbohydrates | 62 g |
| Protein | 7 g |
| Fat | 17 g |
| Saturated Fat | 10 g |
| Sugar | 29 g |
| Fiber | 2 g |
| Sodium | 290 mg |
Health Benefits
These homemade cinnamon rolls are a special treat made with simple ingredients. Eggs and milk provide protein and calcium. Cinnamon contains natural antioxidants that support overall wellness.
Making them at home lets you control the sugar and butter. You can also use whole wheat flour for extra fiber. Enjoy these rolls as an occasional part of a balanced diet.
Pioneer Woman Cinnamon Rolls Recipe

Ingredients
For the Dough
- 4 cups all-purpose flour
- 1 cup whole milk warm
- ¼ cup warm water
- ¼ cup granulated sugar
- 2¼ teaspoons active dry yeast
- ¼ cup unsalted butter melted
- 2 large eggs
- 1 teaspoon salt
For the Filling
- ½ cup unsalted butter softened
- 1 cup brown sugar
- 2 tablespoons ground cinnamon
- 1 teaspoon vanilla extract
For the Icing
- 2 cups powdered sugar
- 3 tablespoons melted butter
- 2 tablespoons milk
- 1 teaspoon vanilla extract
- Pinch of salt
Instructions
Activate the Yeast
- Mix the warm water, sugar and yeast in a small bowl. Stir gently and let it rest for about ten minutes. The mixture should become bubbly and foamy before you continue.
Prepare the Dough
- Combine the flour and salt in a large bowl. Add the warm milk, melted butter, eggs and yeast mixture. Stir until a soft dough forms. It should feel smooth and slightly sticky.
Knead the Dough
- Place the dough on a lightly floured surface. Knead it gently for about ten minutes. Fold and press until the dough becomes soft, smooth and elastic. This creates fluffy cinnamon rolls.
First Rise
- Place the dough into a greased bowl. Cover it with a clean towel. Let it rise in a warm place for about ninety minutes. The dough should double in size before shaping.
Roll Out the Dough
- Transfer the dough onto a lightly floured surface. Roll it into a large rectangle about one-quarter inch thick. Try to keep the thickness even so every roll bakes perfectly.
Add the Cinnamon Filling
- Spread the softened butter across the dough. Sprinkle the brown sugar evenly over the butter. Finish with the ground cinnamon and vanilla. Cover every corner for rich flavor in every bite.
Roll and Slice
- Roll the dough tightly from the long side into a log. Slice it into twelve equal pieces using a sharp knife or dental floss. Place each roll into the prepared baking dish.
Second Rise
- Cover the baking dish with a kitchen towel. Let the rolls rise again for about thirty minutes. They should become soft, puffy, and nearly touch each other before baking.
Bake the Rolls
- Preheat the oven to 350°F (175°C). Bake the cinnamon rolls for about twenty-two to twenty-five minutes. The tops should become lightly golden while the centers stay soft and tender.
Ice and Serve
- Whisk together the powdered sugar, melted butter, milk, vanilla and salt until smooth. Spread the icing over the warm cinnamon rolls. Let it melt into every swirl before serving fresh.
Notes
- Use fresh yeast for the best rise.
- Warm the milk gently. Do not let it become hot.
- Measure the flour carefully for soft dough.
- Knead the dough until it feels smooth and stretchy.
- Let the dough rise in a warm place without drafts.
- Spread the filling evenly across the dough.
- Roll the dough tightly to keep neat swirls.
- Do not overbake the rolls. They should stay soft.
- Ice the rolls while they are still warm.
- Serve fresh for the best flavor and texture.
FAQs about Pioneer Woman Cinnamon Rolls
Can I make the dough the night before?
Yes. Prepare the dough and shape the rolls. Cover the baking dish tightly and refrigerate overnight. The next morning, let the rolls sit at room temperature for about 45 minutes before baking. This makes breakfast much easier.
Why are my cinnamon rolls not soft?
The dough may have too much flour or the rolls may have baked too long. Always measure ingredients carefully and remove the rolls when they are lightly golden. Soft dough creates light and fluffy cinnamon rolls.
Can I freeze homemade cinnamon rolls?
Yes. Freeze baked or unbaked cinnamon rolls in an airtight container for up to two months. Thaw them overnight in the refrigerator. Warm them before serving to enjoy their fresh homemade flavor and texture.
What is the best icing for cinnamon rolls?
Classic vanilla icing is always a great choice because it melts into the warm rolls. Cream cheese frosting is another favorite if you enjoy a richer and slightly tangy flavor. Both taste delicious.
Can beginners make this recipe?
Absolutely. This recipe uses simple ingredients and easy steps. Take your time with the dough and allow enough rising time. Even first-time bakers can make soft, fluffy and delicious cinnamon rolls with confidence.
Final Thoughts
This Pioneer Woman Cinnamon Rolls Recipe is the perfect homemade breakfast for any season. The soft dough, sweet cinnamon filling and creamy icing create an unforgettable treat.
It is easy enough for beginners and special enough for holidays. Bake a fresh batch, share it with your loved ones and enjoy every warm, delicious bite. Homemade cinnamon rolls always bring comfort, joy and wonderful memories to the table.
Hi, I’m Emily Grace! I love cooking simple, tasty food that brings people together. On Bite Dive, I share easy recipes, fun food tips, and ideas to make every meal special. My kitchen is my happy place, and I’m so excited to share it with you!