If you love comfort food, you need to try Gordon Ramsay’s Cheesy Philly Sloppy Joes Recipe. This fun twist combines the flavors of a Philly cheesesteak with the ease of sloppy joes.
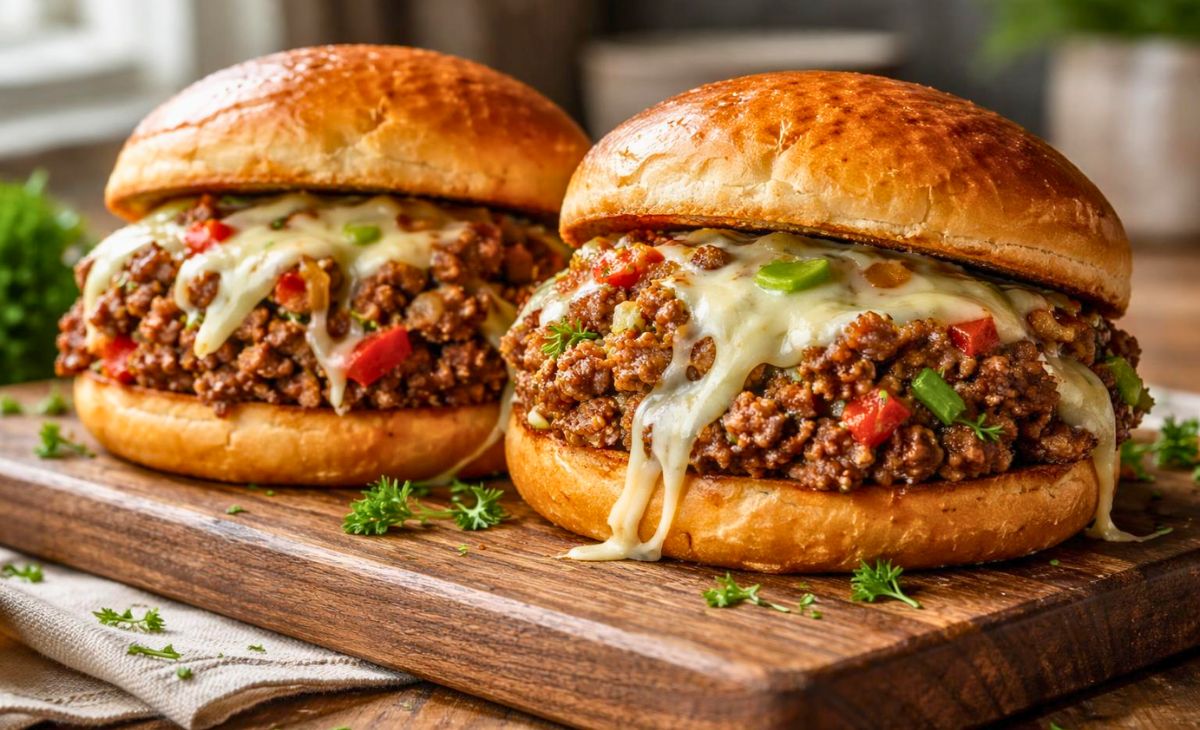
Gordon Ramsay’s Cheesy Philly Sloppy Joes Recipe is packed with juicy beef, melted cheese and tender vegetables.
It is hearty, satisfying and perfect for busy weeknights. Once you make Gordon Ramsay’s Cheesy Philly Sloppy Joes Recipe, it may become a regular part of your family dinner menu.
My Experience With This Recipe
The first time I made this recipe, I wanted something quick but filling. Regular sandwiches felt boring. Traditional sloppy joes felt too simple.
This recipe changed everything. The beef stays juicy. The peppers add sweetness. The melted cheese brings everything together beautifully.
My family loved it from the first bite. The sandwiches disappeared quickly. Now it is one of our favorite comfort food meals.
The best part is how easy it is to prepare. Everything cooks in one skillet, which means less cleanup later.
Recipe Card Info
- Recipe Name: Gordon Ramsay’s Cheesy Philly Sloppy Joes
- Servings: 6
- Prep Time: 15 minutes
- Cook Time: 25 minutes
- Total Time: 40 minutes
- Course: Main Course
- Cuisine: American
- Calories: Approximately 480 kcal per serving

Equipment List
- Large skillet
- Wooden spoon
- Sharp knife
- Cutting board
- Measuring spoons
- Measuring cups
- Cheese grater
- Serving spoon
- Small bowl
Ingredients You Need for Gordon Ramsay’s Cheesy Philly Sloppy Joes
- 1 pound ground beef
- 1 tablespoon olive oil
- 1 green bell pepper, diced
- 1 red bell pepper, diced
- 1 medium onion, diced
- 2 cloves garlic, minced
- 1 tablespoon Worcestershire sauce
- 1 tablespoon ketchup
- 1 teaspoon Dijon mustard
- ½ teaspoon salt
- ½ teaspoon black pepper
- 1 cup beef broth
- 1 tablespoon cornstarch
- 2 tablespoons water
- 1½ cups provolone cheese, shredded
- 6 hamburger buns
- Fresh parsley for garnish
Step-by-Step Guide
1. Prepare the Vegetables
Wash and dice the bell peppers and onion into small pieces. Mince the garlic cloves. Having everything ready before cooking makes the process faster and much easier.
2. Cook the Vegetables
Heat olive oil in a large skillet over medium heat. Add the peppers and onion. Cook for about five minutes until they become soft and slightly golden.
3. Add the Garlic
Stir the minced garlic into the skillet. Cook for one minute. Garlic cooks quickly, so keep stirring to prevent burning and maintain its delicious flavor.
4. Brown the Beef
Add the ground beef to the skillet. Break it apart with a wooden spoon. Cook until fully browned and no longer pink. Drain excess grease if needed.
5. Add the Seasonings
Mix in Worcestershire sauce, ketchup, Dijon mustard, salt and black pepper. Stir well so every bite gets coated with the flavorful mixture.
6. Pour in the Broth
Add the beef broth and stir everything together. Bring the mixture to a gentle simmer. This helps the flavors blend and creates a rich filling.
7. Thicken the Mixture
Mix cornstarch and water in a small bowl. Pour into the skillet. Stir constantly until the mixture thickens slightly and becomes rich and hearty.
8. Add the Cheese
Lower the heat and sprinkle in the shredded provolone cheese. Stir until melted completely. The cheese creates a creamy texture that makes the filling irresistible.
9. Toast the Buns
Lightly toast the hamburger buns in a skillet or oven. Toasting helps prevent the bread from becoming soggy once the filling is added.
10. Assemble and Serve
Spoon the cheesy beef mixture onto each bun. Garnish with fresh parsley if desired. Serve immediately while warm and enjoy every cheesy bite.
Read More: Church’s Fried Chicken Recipe
Tips to Make the Best Gordon Ramsay’s Cheesy Philly Sloppy Joes
- Use fresh vegetables for better flavor.
- Shred cheese yourself for smoother melting.
- Toast the buns before serving.
- Cook beef until nicely browned.
- Do not skip the Worcestershire sauce.
- Use quality ground beef.
- Stir cheese slowly into the mixture.
- Serve immediately while hot.
- Adjust seasoning to taste.
- Add extra cheese if desired.
Common Mistakes to Avoid
- Overcooking the vegetables.
- Using too much liquid.
- Forgetting to drain excess grease.
- Adding cheese over high heat.
- Skipping the bun toasting step.
- Overcrowding the skillet.
- Undercooking the beef.
- Adding too much salt early.
Serving Suggestions
These cheesy sloppy joes pair wonderfully with crispy fries, sweet potato wedges or onion rings. A fresh green salad adds balance to the rich filling. For a family dinner, serve them alongside roasted vegetables or coleslaw.
If you are hosting friends add pickle spears and potato chips for a complete comfort food spread. The combination is simple, satisfying and always a crowd-pleaser.
Variations You Can Try
- Use ground turkey instead of beef.
- Add sliced mushrooms.
- Try mozzarella cheese.
- Use pepper jack for extra spice.
- Add jalapeños for heat.
- Serve over baked potatoes.
- Use brioche buns.
- Add smoked paprika.
- Include sautéed mushrooms.
- Make sliders for parties.
Storage and Reheating Tips
Store leftover filling in an airtight container in the refrigerator for up to four days. Keep the buns separate to maintain texture.
For longer storage, freeze the filling for up to three months. Thaw overnight in the refrigerator before reheating.
Warm the filling in a skillet over medium heat. Add a splash of broth if it becomes too thick. Stir until heated through and serve on fresh buns.
Nutrition Information
| Nutrient | Amount Per Serving |
|---|---|
| Calories | 480 kcal |
| Protein | 28 g |
| Fat | 24 g |
| Carbohydrates | 34 g |
| Fiber | 2 g |
| Sugar | 5 g |
| Sodium | 620 mg |
| Cholesterol | 75 mg |
Health Benefits
This recipe provides protein from the beef and calcium from the cheese. Bell peppers contribute vitamins A and C, while onions add beneficial antioxidants.
Making the dish at home allows you to control ingredients and avoid unnecessary preservatives. Pairing it with vegetables can help create a more balanced meal while still enjoying comfort food.
Gordon Ramsay’s Cheesy Philly Sloppy Joes Recipe
Ingredients
- 1 pound ground beef
- 1 tablespoon olive oil
- 1 green bell pepper diced
- 1 red bell pepper diced
- 1 medium onion diced
- 2 cloves garlic minced
- 1 tablespoon Worcestershire sauce
- 1 tablespoon ketchup
- 1 teaspoon Dijon mustard
- ½ teaspoon salt
- ½ teaspoon black pepper
- 1 cup beef broth
- 1 tablespoon cornstarch
- 2 tablespoons water
- 1½ cups provolone cheese shredded
- 6 hamburger buns
- Fresh parsley for garnish
Instructions
Prepare the Vegetables
- Wash and dice the bell peppers and onion into small pieces. Mince the garlic cloves. Having everything ready before cooking makes the process faster and much easier.
Cook the Vegetables
- Heat olive oil in a large skillet over medium heat. Add the peppers and onion. Cook for about five minutes until they become soft and slightly golden.
Add the Garlic
- Stir the minced garlic into the skillet. Cook for one minute. Garlic cooks quickly, so keep stirring to prevent burning and maintain its delicious flavor.
Brown the Beef
- Add the ground beef to the skillet. Break it apart with a wooden spoon. Cook until fully browned and no longer pink. Drain excess grease if needed.
Add the Seasonings
- Mix in Worcestershire sauce, ketchup, Dijon mustard, salt and black pepper. Stir well so every bite gets coated with the flavorful mixture.
Pour in the Broth
- Add the beef broth and stir everything together. Bring the mixture to a gentle simmer. This helps the flavors blend and creates a rich filling.
Thicken the Mixture
- Mix cornstarch and water in a small bowl. Pour into the skillet. Stir constantly until the mixture thickens slightly and becomes rich and hearty.
Add the Cheese
- Lower the heat and sprinkle in the shredded provolone cheese. Stir until melted completely. The cheese creates a creamy texture that makes the filling irresistible.
Toast the Buns
- Lightly toast the hamburger buns in a skillet or oven. Toasting helps prevent the bread from becoming soggy once the filling is added.
Assemble and Serve
- Spoon the cheesy beef mixture onto each bun. Garnish with fresh parsley if desired. Serve immediately while warm and enjoy every cheesy bite.
Notes
- Use fresh vegetables for better flavor.
- Shred cheese yourself for smoother melting.
- Toast the buns before serving.
- Cook beef until nicely browned.
- Do not skip the Worcestershire sauce.
- Use quality ground beef.
- Stir cheese slowly into the mixture.
- Serve immediately while hot.
- Adjust seasoning to taste.
- Add extra cheese if desired.
FAQs about Gordon Ramsay’s Cheesy Philly Sloppy Joes
Can I make this recipe ahead of time?
Yes. The filling can be prepared one day ahead. Store it in the refrigerator and reheat before serving. The flavors often become even better the next day.
What cheese works best for this recipe?
Provolone is the traditional choice because it melts beautifully and complements the beef. Mozzarella and Monterey Jack are also excellent alternatives.
Can I freeze the filling?
Absolutely. Let the filling cool completely before freezing. Store it in a freezer-safe container for up to three months and thaw before reheating.
How do I keep the buns from getting soggy?
Lightly toast the buns before adding the filling. Toasting creates a barrier that helps the bread stay firm and hold the mixture better.
Can I make this recipe spicy?
Yes. Add diced jalapeños, red pepper flakes or hot sauce to the filling. These ingredients provide extra heat without changing the overall flavor too much.
Final Thoughts
Gordon Ramsay’s Cheesy Philly Sloppy Joes Recipe combines everything people love about comfort food. It is cheesy, hearty, flavorful and easy to make.
The tender beef, colorful peppers and melted provolone create an unforgettable sandwich.
Whether you need a quick weeknight meal or a crowd-pleasing dinner, this recipe delivers every time. One bite is enough to make it a family favorite.

Hi, I’m Emily Grace! I love cooking simple, tasty food that brings people together. On Bite Dive, I share easy recipes, fun food tips, and ideas to make every meal special. My kitchen is my happy place, and I’m so excited to share it with you!